Posts

Showing posts with the label Embroidery

Technique Tuesday: Assembling the 10 Spool Thread Stand

Image
The one thing single needle embroidery machines do not have is a thread stand, with needles threaded for color changes. But that doesn't mean we home sewists, hobbyists, designers, thread artists are limited. There are tools on the market to ease the burden of changing colors when machine embordering our designs. I personally own this 10 spool thread stand and it is wonderful. I don't just use it when I embroider, I also use it for large thread spools that don't fit neatly on my sewing machine and when I plan to stitch in different thread colors. I purchased the ten thread spool, thread stand. There is a 20 version on the market, but I thought that was too many for me. There are also 1, and 2 thread stands too. Video Ready to start sewing your project? Please leave your comments below on what you plan on making .  This blog isn't sponsored If you enjoy reading my blog posts please consider supporting my creative endeavors by donating via  PayPal Me  or  Buying Me a C...
Technique Tuesday: Machine Embroidered Greeting Cards

Image
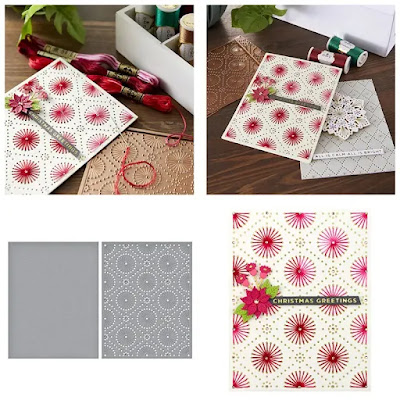
I love machine embroidery and I also love making handmade cards. So, imagine how I felt to learn that embroidering cards is trending now. Some people are using dies that are specifically made to die cut and then use embroidery floss to create the card front or insert.  Circular Stitch Background Metal Cutting Dies And that is a lovely thing to do, however it is limiting. Sure you can change colors of thread & cardstock to make each card different, but if you truly want something unique, combining machine embroidery will allow you to do just that. And if you digitize your own designs or edit an existing design to customize as your own, you will truly have a one of a kind design. Video Here are some tips for creating unique custom, bespoke handmade cards by the Embroidery Library Ready to start crafting your project? Please leave your comments below on what you plan on making .  This blog isn't sponsored If you enjoy reading my blog posts please consider supporting my creat...

Technique Tuesday: Punch Needling Stitch Size & Row Space

Image
Ok, so you've got your fabric, yarn, needles, and design that you want to tuft aka punch needle, but you're not sure how large your stitches should be. How far to space them apart, and which side of the design is the right side. This Technique Tuesday we will cover that. You'll learn how to properly space your stitches. How wide your rows should be and how changing stitch length changes the dynamic of your fabric art/rug. Video: Stitch Size & Row Spacing This video is from the Oxford Company. The Oxford Company has a great selection of blogs called # OxCoPALs and videos that walk you through the basics of Punch Needling as well as Rug Hooking. I recommend going over there to learn more.  Ready to start crafting your project? Please leave your comments below on what you plan on making .  This blog isn't sponsored If you enjoy reading my blog posts please consider supporting my creative endeavors by donating via  PayPal Me  or  Buying Me a Cup of...

Technique Tuesday: Fabric for Punch Needling

Image
This Technique Tuesday we will learn how to select the appropriate fabric to work best with our punch needling projects. I do needle felting with an embellisher machine and by hand. And I love that you can use various substrates and felt with them. It puts the MIX in mix media projects. However, when it comes to hand embroidery, the fabric you construct your project on is quite important. Consider the following fabric options: Monk Cloth : This is a tightly woven fabric that is made from 100% cotton. It is a good choice for punch needling because it is durable and has a nice texture. The Dorr Mill Monk's cloth is woven specifically for punch needle art. Try to find one that has 12-14 holes in it. It is a self healing fabric. Linen : This is a natural fiber fabric that is known for its strength and durability. Linen is a good choice for punch needling because it is easy to work with and has a nice drape. Boao Linen is a great choice for making heirloom projects. It is a self...

Technique Tuesday: Punch Needles Types

Image
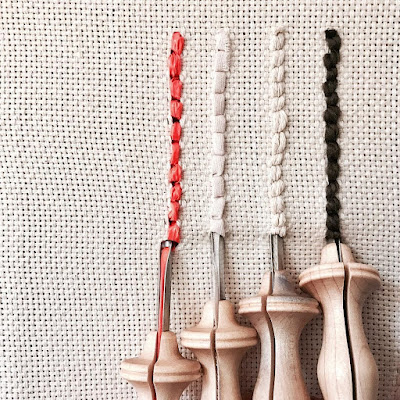
Last week we learned about the Punch Needling technique. This Technique Tuesday we will learn about the variety of punch needles on the market and determine which one will work best with our projects. Oxford Punch Needles Video: Which Punch Needle to Purchase This video purchasing guide is from Vera at Studio VerSie.   Oxford is the cadillac of Punching Needles, this video is a guide to their selection of needles. The Oxford Company has a great selection of blogs called # OxCoPALs and videos that walk you through the basics of Punch Needling as well as Rug Hooking. I recommend going over there to learn more. Especially how to transfer your pattern to the backing fabric . Ready to purchase some punch needles and work on a custom fabric art project? Please leave your comments below .  This blog isn't sponsored If you enjoy reading my blog posts please consider supporting my creative endeavors by donating via  PayPal Me  or  Buying Me a Cup of Tea/Co...

Technique Tuesday: Punch Needling

Image
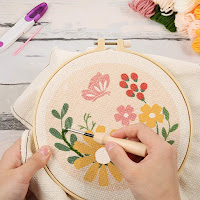
Hey Everybody, I am still leaning hard on the fabric art trends. This is my 2023 - creating art that inspires and elicits joy. Well, in mid July 2023 I discovered a new fabric art technique. It is new to me, but not new in general. It is a technique that is becoming quite popular as a relaxing way to get into creating fabric art, pillows, rugs, whatever your heart desires, and I am talking about Punch Needling! Images: Pllieay Punch Needle Embroidery Starter Kits Punch needling is a type of embroidery that uses a punch needle tool to create loops of yarn on a fabric. The punch needle tool has a hollow shaft that the yarn is threaded through, and a sharp point that is used to punch the yarn through the fabric. The yarn loops are then pulled tight, creating a fabric with a dense, textured surface. Punch needling can be used to create a variety of projects, including wall hangings, pillows, rugs, and coasters. It is a relatively easy techni...

Embroidery Settings & Advanced Editing with Embroidery Software

Image
Set Embroidery Settings & Edit Stock Designs These videos tutorials focus on embroidery settings and editing features in the software. You can edit stock embroidery designs and designs you've digitized.  1. Embroidery Settings 2. Editing 101: Objects & Text 3. Editing 201: Blocks & Stitches SINGER® bundles the Professional Sew-Ware (PSW) Deluxe™ embroidery digitizing, advanced editing, and lettering software that is shipped with the SINGER® LEGACY™ SE340 Sewing & Embroidery Machine. Singer Futura owners and users software is similar and this these tutorials are applicable .  To view all of the videos & blogs in the series click the PSW Deluxe keyword below.

Create Monograms & Embroidery Letters with Embroidery Software

Image
Custom Monograms & Lettering These videos tutorials focus on accessing the Lettering mode to create custom lettering designs and monograms using the installed embroidery fonts. You can also create new embroidery fonts with the Hyperfont tool.  1. Lettering 101: Access the Lettering Mode 2. Lettering 201: Frames 3. Lettering 301: Hyperfont 4. Lettering 401: Monograms & Tack Down Stitches This series of videos is targeted to the Singer Futura owners and owners of Professional Sew-Ware Deluxe (PSW Deluxe) that comes bundled with the SINGER Legacy SE340 embroidery sewing machine as the software is similar.  To view all of the videos & blogs in the series click the PSW Deluxe keyword below.

Create Custom Embroidery with Embroidery Software

Image
How To Create Custom Embroidery Using Your Computer Learn how to create custom embroidery designs by watching these video tutorials and reading my eBook . These videos focus on how to use this powerful software, Professional Sew-Ware Deluxe, by Singer , to digitize embroidery designs.   1. Activating the Digitizing Mode 2. Freeform Tool 3. Column Tool 4. Geometric Shapes Tools 5. Magic Wand Tool 6. Putting It All Together 7. Appliqué 8. Design Browser 9. Color Blending 10. Autopunch I have created a deep dive guide: DIGITIZING WITH PROFESSIONAL SEW-WARE DELUXE™ that compliments these videos and provides details about the Digitizing mode in PSW Deluxe, how to access it, and how to use its powerful features.   To view all of the videos & blogs in the series click the PSW Deluxe keyword below.

Color Blending - PSW Deluxe Digitizing Embroidery Video Series

Image
Hello everyone, here is another advanced level creative embroidery digitizing tutorial. Once you have mastered the basics, learning how to blend thread colors will add some spice to your designs. This video tutorial focuses on the creating color blended fills in the Professional Sew-Ware® Deluxe digitizing software by Singer. This lesson will demonstrate how to create the effect in PSW Deluxe. This is an advanced level digitizing technique, and you should understand the fundamentals of color blending and thread density before you attempt this technique. Using the Degrade feature in the Embroidery Settings and some math and you can achieve some beautiful color blends. If you enjoyed this video and want to see more of the series, please like the video and click the subscribe button. You can subscribe without leaving this blog post by mousing/hovering over the Tanya Owens Designs logo in the lower right corner. Blogs on Density and Color Blending: Melco - https://www.melco...

Autopunch - PSW Deluxe Digitizing Embroidery Video Series

Image
Hello everyone the next tutorial for the Singer Professional Sew-Ware® Deluxe  (PSW Deluxe) digitizing software is live. This episode focuses on the Autopunch tool in the Professional Sew-Ware® Deluxe digitizing software by Singer. Autopunch is an automatic digitizing tool that allows you to create embroidery designs using a wizard. After this lesson you will be able to use the Autopunch tool to create your own custom embroidery.  Although the target audience are owners of the Singer Legacy SE340 sewing and embroidery machines, Futura owners will find value in this video too. Watch the Video If you enjoyed this video and want to see more of the series, please like the video and click the subscribe button. You can subscribe without leaving this blog post by mousing/hovering over the Tanya Owens Designs logo in the lower right corner and then clicking it. Autopunch or Magic Wand So, opinion time - which tool should you use? The Autopunch automatic digitizing tool ...

Appliqué - PSW Deluxe Digitizing Embroidery Video Series

Image
Hello Everybody! Happy Digitizing. We've come quite a way in learning how to use the digitizing, editing, and lettering tools in the Singer Professional Sew-Ware® Deluxe embroidery software. So, now we are going to focus on putting those skills to work by creating some fun projects. This blog and future blogs will focus on some of the creative aspects of the software as you combine the tools to create specialized projects. This video tutorial will teach you how to manually create an Appliqué design. The video demonstrates creating the traditional appliqué with satin overlock stitches with a bonus lesson demonstrating using motif stitches for overlocking.     If you want to follow along with this video you can download the winking smiley face image here:  https://tr.im/WinkingWhite   If you enjoyed this video and want to see more of the series, please like the video and click the subscribe button. You can subscribe without leaving this blog post b...

Accessing & Viewing Embroidery Designs - PSW Intro & Deluxe Digitizing Embroidery Video Series

Image
Did you know that there are three different ways to access & view embroidery designs with the Singer Professional Sew-Ware® Deluxe  (PSW Deluxe) and PSW Intro embroidery digitizing applications? No, you didn't know. Don't feel bad, I got you - this blog post and video tutorial will demonstrate all three ways you can access, view and work on embroidery designs in PSW Intro and Deluxe software. This lesson is beneficial to anyone who owns the PSW Intro and PSW Deluxe applications: owners of the Superb EM200, Legacy SE300 and Legacy SE340 machines. We will first look at the Design Browser, which tells you quite a bit of information about the embroidery design without opening it. The Design Browser can view any machine embroidery files (e.g. XXX, DST, PES) as well as CHE and FHE files. Next we will look at the Design Library, which contains the 200 designs that came bundled with your machine. Lastly, we will look at the Embroidery Design Collection, which contains 2,900 em...

Lettering 401: Monograms & Knock Down Stitches - PSW Deluxe Digitizing Embroidery Video Series

Image
Hello everyone the fourth of four Lettering tutorials is live. The Lettering 401 - Monograms and Knockdown Stitches tutorial teaches you how to use the Monogram tool to create custom monograms. You will also learn how to create knockdown stitches also know as nap-tack or pile drop stitches to tack down high pile fabrics. And you will do all of this with Professional Sew-Ware® Deluxe digitizing software by Singer. Knockdown stitches are useful when you are embroidering on high pile fabrics. They hold the pile down so your design stays on top and looking great. When sewing on terry or any fabric with loops and nap, generally a topping stabilizer is used. These can be helpful, but have a limitation: They do not hold down the nap past the actual stitch, which means outlines can be lost in the surrounding fabric.   If you enjoyed this video and want to see more of the series, please like the video and click the subscribe button. You can subscribe without leaving this b...

Lettering 301: Hyperfont - PSW Deluxe Digitizing Embroidery Video Series

Image
Hello everyone the third of four Lettering tutorials is live. The Lettering 301 - Hyperfont tutorial teaches you how to create embroidery lettering by using the True Type Fonts on your computer. You can then use/manipulate these new embroidery fonts you create the same way you can adjust the lettering fonts that are shipped with Professional Sew-Ware® Deluxe digitizing software by Singer. Make sure you watch all the way until the end for the bonus lesson on the Name Drop feature. It is a time saving feature that comes in handy when embroidering names, for instance for team jerseys.  If you would like to follow along with this video, you can download the Waltograph font from dafont here:  www.dafont.com/waltograph.font If you enjoyed this video and want to see more of the series , please like the video and click the subscribe button. You can subscribe without leaving this blog post by mousing/hovering over the Tanya Owens Designs logo in the lower right c...

Putting it All Together - PSW Deluxe Digitizing Embroidery Video Series

Image
Hello everyone, if you have been following along, viewing and practicing with all of the tutorials in this video series for learning how to digitize with the Singer Professional Sew-Ware® Deluxe  (PSW Deluxe) digitizing software, congratulations , you are now ready to put into practice all of those disparate skills and complete digitizing a design. If you landed on this page and have not seen any of the other videos in this series , I recommend that you watch the previous video tutorials or read my eBook Digitizing with the PSW Deluxe Embroidery Software before attempting to follow the steps in the below video. This is a comprehensive video that demonstrates how to use all of the manual digitizing tools, as well as the editing and lettering modes and the embroidery settings. We will be digitizing A Yellow-Smiley Face. If you want to follow along with this video you can download the Smiley Face image here:  https://tr.im/YellowSmiley   If you enjoyed this vi...

Magic Wand Tool - PSW Deluxe Digitizing Embroidery Video Series

Image
Hello everyone this video tutorial features the last of the seven manual digitizing tools for the Singer Professional Sew-Ware® Deluxe  (PSW Deluxe) digitizing software. The Magicwand is a semi-automatic digitizing tool that allows you to quickly digitize certain sections with the help of the software. It is a unique tool for creating embroidery as it is built for speed. After this lesson you will know how to use the Magicwand tool to create your own custom embroidery.  If you want to follow along with this video you can download the winking smiley face image here:  https://tr.im/WinkingWhite   If you are unfamiliar with how to use the Editing mode in PSW Deluxe, please view the first lesson on editing Blocks in the Editing 201 - Blocks & Stitches video tutorial. If you enjoyed these videos and want to see more of the series, please like the video and click the subscribe button. You can subscribe without leaving this blog post by mousing/hoverin...

Editing 201: Blocks & Stitches - PSW Deluxe Digitizing Embroidery Video Series

Image
Hello everyone the next tutorial for the Singer Professional Sew-Ware® Deluxe  (PSW Deluxe) digitizing software is live. This tutorial is the second in a two part series on Editing. This lesson introduces the Editing Mode. You will learn how to edit Blocks and Stitches that you digitized and to Split Blocks in stock machine embroidery designs. So, if you found a great stock embroidery design but there are parts of it you don't want to stitch out,  after this lesson you know how to make those custom edits to machine embroidery designs. And if you are interested in creating overlapping appliqués, you will learn how to remove overlapping stitches so the design isn't bulky. NOTE: If you own the Singer Futura software and embroidery machines, this video is applicable to you too as the features in both software are the same. If you enjoyed this video and want to see more of the series, please like the video and click the subscribe button. You can subscribe without l...

Editing 101: Objects & Text - PSW Deluxe Digitizing Embroidery Video Series

Image
Hello everyone the next tutorial for the Singer Professional Sew-Ware® Deluxe  (PSW Deluxe) digitizing software is live. This tutorial is the first in a two part series on Editing in the Professional Sew-Ware® Deluxe  digitizing software by Singer. In this lesson you will learn how manipulate objects and to edit lettering you created in PSW Deluxe. Although the target audience are owners of the Singer Legacy SE340 sewing and embroidery machines, Futura owners will find value in this video too. Watch the Video If you enjoyed this video and want to see more of the series, please like the video and click the subscribe button. You can subscribe without leaving this blog post by mousing/hovering over the Tanya Owens Designs logo in the lower right corner and then clicking it. This blog is not sponsored . If you want to support my content creation consider making a small donation by purchasing me a cup of coffee: https://www.ko-fi.com/tanyaowens Join me by tweeting ...

The Geometric Shapes Tools - PSW Deluxe Digitizing Embroidery Video Series

Image
Hello everyone the next tutorial for the Singer Professional Sew-Ware® Deluxe  (PSW Deluxe) digitizing software is live. This tutorial focuses on the Geometric Shapes tools in the Professional Sew-Ware® Deluxe  digitizing software by Singer. With the Shapes tools you can create a custom embroidery design without using artwork as a guide. You can also use a combination of the Freeform, Column and Shapes tool in your embroidery design. The Shapes tools are highly customizable: for instance, you can create borders for your monograms, stars and stripes, etc. You are only limited by your imagination. Watch the Video  If you enjoyed this video and want to see more of the series, please like the video and click the subscribe button. You can subscribe without leaving this blog post by mousing/hovering over the Tanya Owens Designs logo in the lower right corner and then clicking it. Companion Guide A comprehensive companion guide with all of the steps explained in thi...