Posts

Showing posts with the label sewing

Technique Tuesday: Unleash Your Sewing Machine's Potential with Circular Stitching (DIY Tool Edition!)

Image
Welcome back to Technique Tuesday! Today, we're exploring the captivating world of circular stitching using your sewing machine's decorative stitches. I've always been fascinated by the beautiful effects you can achieve with this technique, as I discussed in two previous blog posts: Having Fun Sewing Decorative Stitches in a Circle Technique Tuesday: Stacking Stitches I'm excited to share my DIY approach, especially since my specific sewing machine didn't have a readily available accessory for this. Practice Pillow with Decorative Circular Stitches Why Circular Stitching? Circular stitching opens up a world of creative possibilities. It's perfect for adding unique embellishments to garments, creating stunning quilt designs, and enhancing fabric art projects. Imagine the intricate circular designs you can create using your machine's built-in decorative stitches! My Sewing Machine Challenge (and Solution!): I own the Singer Legacy 340, a fantastic machine w...

Technique Tuesday: 7 Sewing Tips and Tricks to Transform Your Creations

Image
Welcome to Technique Tuesday! Today, we're diving into a treasure trove of sewing tips and tricks that will take your projects to the next level. Whether you're a beginner or a seasoned seamstress, these tips can help you improve your skills, efficiency, and overall sewing experience. Video Tutorial Key Tips to Expect: Accurate Elastic Stitching (Joining Elastic Ends):  Demonstrates a neat trick for joining elastic ends seamlessly. Perfect Mitered Corners: Mitered corners can be tricky, but this method looks surprisingly straightforward. Combining & Finishing Elastic Ends With Fabric: This hack shows how to neatly encase elastic ends within a fabric casing, creating a clean and professional finish. Perfect Jeans Hem: Uses two pieces of cardboard to level the foot and make it easier to go over thick fabric - for instance to create an even hem on jeans, making it easier to sew through the thick layers of denim. The video demonstrates using a piece of 4x7 mm cardboard wit...

Technique Tuesday: Conquer Bias Binding with This Fast & Easy Hack

Image
Welcome back to Technique Tuesday! This week, we're tackling a sewing essential: bias binding. While it can sometimes feel tedious, this clever hack for creating continuous bias binding, shared by SewCanShe , will revolutionize your projects. As someone who uses bias binding frequently in my fabric art, especially for finishing edges on wall hangings and adding a pop of color to fabric creations, I'm thrilled to share this time-saving technique. Why Bias Binding? Bias binding is essential for finishing raw edges, especially on curved or shaped projects. It adds a clean, polished look and can also be used to create decorative accents. In my fabric art, I use bias binding to frame my pieces, add contrasting borders, and create interesting design elements. Tutorial Video This video demonstrates a brilliant method for creating continuous bias binding from a single piece of fabric. No more piecing together short strips! This technique is not only faster but also results in a smo...

Technique Tuesday: Assembling the 10 Spool Thread Stand

Image
The one thing single needle embroidery machines do not have is a thread stand, with needles threaded for color changes. But that doesn't mean we home sewists, hobbyists, designers, thread artists are limited. There are tools on the market to ease the burden of changing colors when machine embordering our designs. I personally own this 10 spool thread stand and it is wonderful. I don't just use it when I embroider, I also use it for large thread spools that don't fit neatly on my sewing machine and when I plan to stitch in different thread colors. I purchased the ten thread spool, thread stand. There is a 20 version on the market, but I thought that was too many for me. There are also 1, and 2 thread stands too. Video Ready to start sewing your project? Please leave your comments below on what you plan on making .  This blog isn't sponsored If you enjoy reading my blog posts please consider supporting my creative endeavors by donating via  PayPal Me  or  Buying Me a C...

Technique Tuesday: Use Ban-Roll to Sew Narrow Hems

Image
Whether you use the roll hem foot or manually fold those hems, it's always good to have another technique in your sewing toolbox. This Technique Tuesday, Downtown Tailoring will demonstrate the Ban-Roll technique to sew narrow hems. I haven't tried it yet as I don't have a project that requires narrow hems at the moment, but if you give it a try, let me know in the comments below. Video This technique is from Downtown Tailoring located in Ottawa, Ontario Canada. Ready to start sewing your project? Please leave your comments below on what you plan on making .  This blog isn't sponsored If you enjoy reading my blog posts please consider supporting my creative endeavors by donating via  PayPal Me  or  Buying Me a Cup of Tea/Coffee .  

Technique Tuesday: Yarn Couching with the Rolled Hem Foot

Image
Hi Everybody, recently I learned that you can do yarn couching using the Rolled Hem foot. So, no need to purchase a Couching foot. It also means that the Rolled Hem foot has multiple uses, which is great. When couching yarn you can use thread the color of the yarn so that the yarn stands out or choose to use a contrasting color on the yarn so the stitches stand out too. And lastly you can use nylon microfilament thread so that the stitches disappear and the yarn seems to float on the garment.  I did a test sew using my old standard, an old bedsheet. In the image above I used  medium weight size 4 worsted acrylic yarn, a wide ribbon, and sari yarn that I purchased to felt with. The three white cords are craft yarn that I corded, something I will discuss in a future blog.  I purchased monofilament thread  Sew-ology1001 Transparent Nylon Thread from Hobby Lobby on sale for .99.  I also purchased a larger set of 6 additional Rolled Hem feet to create hems in the fo...

Technique Tuesday: Stacking Stitches

Image
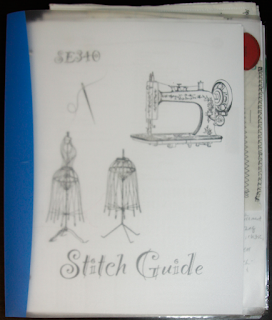
Hello everyone, this Technique Tuesday we are focusing on decorative stitches that come with sewing machines. Specifically  sewing two decorative stitches in different colors on top of each other: stacking stitches. This summer I finally created a stitch chart of all of the stitches that came with my sewing machine. My machine comes with 250 stitches, so I repurposed items I had in my house to create a functional, nothing fancy stitch book.   I used an old 3-ring binder, an old bed sheet that I cut up, 40wt and 60wt thread and stitched out all of my stitches. Experts, that is seasoned sewists, recommend that you create a stitch chart or guide because the stitches on your machine or in your machine's guide will stitch out differently on fabric. My guide isn't fancy like some you will see on blogs, PBS or YouTube channels. My guide is practical. I can flip through it, see the stitches I want to sew and stitch them out. I also included quick reference guides with tips ...

Having Fun Sewing Decorative Stitches in a Circle

Image
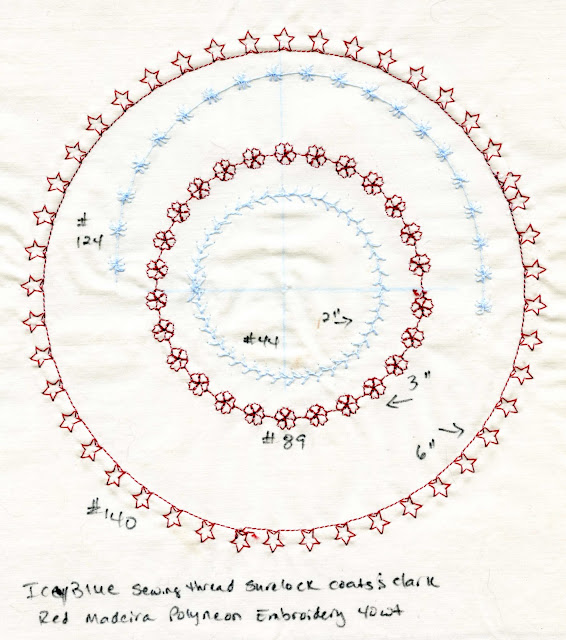
The decorative stitches on the Singer Legacy 340 / 300 sewing & embroidery machine are beautiful. I finally stitched out all 250 of the stitches and placed them in a binder for future reference. I also created my own circular stitch tool so I can stitch out large circles using the decorative stitches. I think they came out beautifully. The circles on the white background are my first attempt, so you see that blue incomplete circle went wonky because I forgot to secure the pin tool. I used a mixture of polyester overlock and embroidery thread. The second set of circles I wanted to stitch out large circle. The largest in this group is 8 inches all the way to 2 inches. I am using Simthread polyester embroidery thread . When I used Madeira Rayon the thread kept breaking. But I have zero issues with Simthread. Thread Colors and Stitch Numbers 2" Circle Color #507 Emerald Green | Decorative Stitch # 124 3" Circle Color #800 Red | Decorative Stitch # 75 4" Circle Col...