Posts

Showing posts from October, 2023

Technique Tuesday: Weaving Bracelets Using a Bracelet Loom

Image
This summer I watched quite a few crafting videos online and wondered if I should incorporate my own spun fabric into my sewing & fabric art mix. Before I dropped hundreds of dollars on a large weaving loom I decided that I should try something a wee bit smaller to get my feet wet and see if it was something I really wanted to do or a whim. So, I purchased the Bracelet Loom by Leisure Art . Now it doesn't have all of the fancy moving parts that a Rigid Heddle Loom has, but the basic concepts are there and it gives me the opportunity to flex or scratch that itch. My $8.99 + tax investment in the loom along with a purchase of embroidery floss and what I thought was embroidery floss, but turned out to be craft thread, all from Hobby Lobby got me started. I later shopped online shopping for clasps to finish the bracelet. I opted for brushed brass.  I was all set to start my venture in weaving. That is until I read the instructions and started scratching my head and weeping. I neede

Technique Tuesday: Assembling the 10 Spool Thread Stand

Image
The one thing single needle embroidery machines do not have is a thread stand, with needles threaded for color changes. But that doesn't mean we home sewists, hobbyists, designers, thread artists are limited. There are tools on the market to ease the burden of changing colors when machine embordering our designs. I personally own this 10 spool thread stand and it is wonderful. I don't just use it when I embroider, I also use it for large thread spools that don't fit neatly on my sewing machine and when I plan to stitch in different thread colors. I purchased the ten thread spool, thread stand. There is a 20 version on the market, but I thought that was too many for me. There are also 1, and 2 thread stands too. Video Ready to start sewing your project? Please leave your comments below on what you plan on making .  This blog isn't sponsored If you enjoy reading my blog posts please consider supporting my creative endeavors by donating via  PayPal Me  or  Buying Me a Cup

Technique Tuesday: Use Ban-Roll to Sew Narrow Hems

Image
Whether you use the roll hem foot or manually fold those hems, it's always good to have another technique in your sewing toolbox. This Technique Tuesday, Downtown Tailoring will demonstrate the Ban-Roll technique to sew narrow hems. I haven't tried it yet as I don't have a project that requires narrow hems at the moment, but if you give it a try, let me know in the comments below. Video This technique is from Downtown Tailoring located in Ottawa, Ontario Canada. Ready to start sewing your project? Please leave your comments below on what you plan on making .  This blog isn't sponsored If you enjoy reading my blog posts please consider supporting my creative endeavors by donating via  PayPal Me  or  Buying Me a Cup of Tea/Coffee .  

Technique Tuesday: Yarn Couching with the Rolled Hem Foot

Image
Hi Everybody, recently I learned that you can do yarn couching using the Rolled Hem foot. So, no need to purchase a Couching foot. It also means that the Rolled Hem foot has multiple uses, which is great. When couching yarn you can use thread the color of the yarn so that the yarn stands out or choose to use a contrasting color on the yarn so the stitches stand out too. And lastly you can use nylon microfilament thread so that the stitches disappear and the yarn seems to float on the garment.  I did a test sew using my old standard, an old bedsheet. In the image above I used  medium weight size 4 worsted acrylic yarn, a wide ribbon, and sari yarn that I purchased to felt with. The three white cords are craft yarn that I corded, something I will discuss in a future blog.  I purchased monofilament thread  Sew-ology1001 Transparent Nylon Thread from Hobby Lobby on sale for .99.  I also purchased a larger set of 6 additional Rolled Hem feet to create hems in the following sizes: 3mm (1/8&

Technique Tuesday: Stacking Stitches

Image
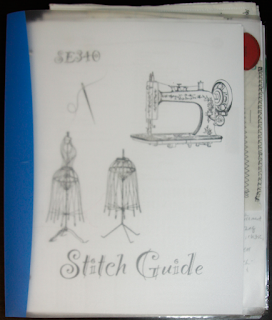
Hello everyone, this Technique Tuesday we are focusing on decorative stitches that come with sewing machines. Specifically  sewing two decorative stitches in different colors on top of each other: stacking stitches. This summer I finally created a stitch chart of all of the stitches that came with my sewing machine. My machine comes with 250 stitches, so I repurposed items I had in my house to create a functional, nothing fancy stitch book.   I used an old 3-ring binder, an old bed sheet that I cut up, 40wt and 60wt thread and stitched out all of my stitches. Experts, that is seasoned sewists, recommend that you create a stitch chart or guide because the stitches on your machine or in your machine's guide will stitch out differently on fabric. My guide isn't fancy like some you will see on blogs, PBS or YouTube channels. My guide is practical. I can flip through it, see the stitches I want to sew and stitch them out. I also included quick reference guides with tips on whi