Posts

Technique Tuesday: Unleash Your Sewing Machine's Potential with Circular Stitching (DIY Tool Edition!)

Image
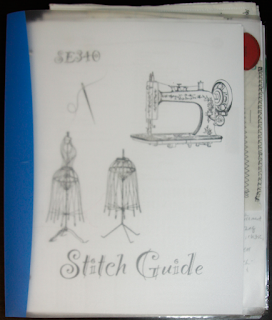
Welcome back to Technique Tuesday! Today, we're exploring the captivating world of circular stitching using your sewing machine's decorative stitches. I've always been fascinated by the beautiful effects you can achieve with this technique, as I discussed in two previous blog posts: Having Fun Sewing Decorative Stitches in a Circle Technique Tuesday: Stacking Stitches I'm excited to share my DIY approach, especially since my specific sewing machine didn't have a readily available accessory for this. Practice Pillow with Decorative Circular Stitches Why Circular Stitching? Circular stitching opens up a world of creative possibilities. It's perfect for adding unique embellishments to garments, creating stunning quilt designs, and enhancing fabric art projects. Imagine the intricate circular designs you can create using your machine's built-in decorative stitches! My Sewing Machine Challenge (and Solution!): I own the Singer Legacy 340, a fantastic machine w...

Technique Tuesday: Mastering the Diamond Twill Weave – From Tapestries to Trendy Bracelets

Image
Welcome back to Technique Tuesday! This week, we're diving into the captivating world of weaving with a beautiful and versatile pattern: the diamond twill. This technique creates a textured, geometric design that's perfect for a variety of projects, from large-scale tapestries to delicate woven bracelets. I'm excited to share this tutorial from Spruce & Linen, along with a free downloadable pattern, and show you how I've adapted it for both tapestry and bracelet making! Why Diamond Twill? The diamond twill weave creates a visually appealing texture and adds a touch of sophistication to any project. It's a fantastic pattern to learn because it can be adapted for so many different applications. Video Tutorial This video provides a clear and concise demonstration of how to weave the diamond twill pattern, following a grid-style chart. Spruce & Linen's instructions are easy to follow, making this technique accessible even for beginners. What You'll ...

Technique Tuesday: Add a Touch of Handmade Charm with a Woven Wristlet Keychain

Image
Welcome back to Technique Tuesday! This week, we're getting crafty with a fun and functional project: a woven wristlet keychain. These little accessories are not only stylish but also incredibly useful for keeping your keys organized and easily accessible. I love adding handmade touches to my everyday items, and this woven keychain is a perfect example. I'm excited to share this tutorial from Spruce & Linen, along with a free downloadable pattern to make your own! Why a Woven Wristlet Keychain? Wristlet keychains are a fantastic way to personalize your keys and add a touch of handmade charm to your everyday carry. They also make thoughtful gifts for friends and family. Plus, this weaving technique is a great way to use up scrap yarn or ribbon! What You'll Learn (from the video) This video provides a clear and concise demonstration of how to weave a beautiful and durable wristlet keychain. Spruce & Linen does a fantastic job of breaking down the process into e...

Technique Tuesday: 7 Sewing Tips and Tricks to Transform Your Creations

Image
Welcome to Technique Tuesday! Today, we're diving into a treasure trove of sewing tips and tricks that will take your projects to the next level. Whether you're a beginner or a seasoned seamstress, these tips can help you improve your skills, efficiency, and overall sewing experience. Video Tutorial Key Tips to Expect: Accurate Elastic Stitching (Joining Elastic Ends):  Demonstrates a neat trick for joining elastic ends seamlessly. Perfect Mitered Corners: Mitered corners can be tricky, but this method looks surprisingly straightforward. Combining & Finishing Elastic Ends With Fabric: This hack shows how to neatly encase elastic ends within a fabric casing, creating a clean and professional finish. Perfect Jeans Hem: Uses two pieces of cardboard to level the foot and make it easier to go over thick fabric - for instance to create an even hem on jeans, making it easier to sew through the thick layers of denim. The video demonstrates using a piece of 4x7 mm cardboard wit...

Technique Tuesday: Conquer Bias Binding with This Fast & Easy Hack

Image
Welcome back to Technique Tuesday! This week, we're tackling a sewing essential: bias binding. While it can sometimes feel tedious, this clever hack for creating continuous bias binding, shared by SewCanShe , will revolutionize your projects. As someone who uses bias binding frequently in my fabric art, especially for finishing edges on wall hangings and adding a pop of color to fabric creations, I'm thrilled to share this time-saving technique. Why Bias Binding? Bias binding is essential for finishing raw edges, especially on curved or shaped projects. It adds a clean, polished look and can also be used to create decorative accents. In my fabric art, I use bias binding to frame my pieces, add contrasting borders, and create interesting design elements. Tutorial Video This video demonstrates a brilliant method for creating continuous bias binding from a single piece of fabric. No more piecing together short strips! This technique is not only faster but also results in a smo...

Technique Tuesday: Taking Machine Needle Felting Further (Part 2) - Unleash Your Creativity with Unexpected Materials

Image
Welcome back to Technique Tuesday! Last week, we explored the basics of machine needle felting. This week, we're diving deeper into advanced techniques and project ideas, focusing on the incredible versatility of materials you can use. Machine needle felting is a core technique in my fabric art, and I'm always experimenting with different materials to achieve unique textures and effects. Tutorial Video In Part 1 , we learned about the basic principles of needle felting, the essential tools and materials, and some fundamental techniques like layering and creating texture. I recommend reading the blog post and watching the video if you are unfamiliar with this technique. This second video showcases advanced machine needle felting techniques, but what truly excites me about this craft is the freedom to use almost any material that can felt into a base fabric. Think beyond traditional wool – scraps of fabric, yarn, leftover threads from sewing projects, even bits of lace or rib...

Technique Tuesday: Diving into the World of Machine Needle Felting (Part 1)

Image
Welcome back to Technique Tuesday! This week, we're exploring the fascinating world of machine needle felting. This technique has become a staple in my own fabric art creations, and I'm excited to share some curated knowledge with you. Machine needle felting allows you to create textured surfaces, blend colors, and even sculpt three-dimensional forms using specialized needles and a machine. It's a fantastic way to add depth and dimension to your textile projects. Why Machine Needle Felting? Machine needle felting offers several advantages over traditional hand needle felting. It's generally faster, especially for larger projects, and allows for more intricate detail and precision. It's also a great option for those who may find hand felting physically challenging. Tutorial Video This first video in a two-part series provides a great introduction to machine needle felting. It covers the basics of what needle felting is, the tools and materials you'll need, and...

Technique Tuesday: Weaving Up Some Fun with a WOVEN Lattice Twill Bookmark - Tutorial

Image
Welcome back to another Technique Tuesday! This week, we're diving into the world of weaving with a charming project: a woven lattice twill bookmark. It's a fantastic way to use up scrap yarn, learn a new skill, and create a beautiful and functional piece you can cherish in your favorite books. Tutorial Video In this tutorial, you'll be guided step-by-step through the process of creating this lovely bookmark. It covers the materials you'll need, the basic weaving techniques involved, and how to create the distinctive lattice twill pattern. Don't worry if you're a beginner – this project is perfect for those new to weaving! Why a Woven Bookmark? Bookmarks are more than just page holders; they're small treasures that accompany us on our literary journeys. A handmade bookmark adds a personal touch to your reading experience. Plus, this woven lattice twill design is not only beautiful but also surprisingly durable. What You'll Learn: Basic weaving techni...

Snip & Sketch: Your Quick Guide to Screen Captures (and a Handy Tutorial!)

Image
Ever needed to quickly grab a screenshot of something on your screen? Whether it's for sharing a funny meme, demonstrating a software feature, or preserving a webpage before it changes, screen captures are incredibly useful. And thankfully, Windows has a built-in tool that makes the process a breeze: Snip & Sketch! Video Tutorial If you're unsure how to use this handy utility, don't worry! I've created a short and sweet YouTube tutorial titled: How to Make a Screen Capture using Snip and Sketch  to walk you through the process step-by-step. Watch the tutorial below:  Benefits of Using Snip & Sketch But why should you use Snip & Sketch in the first place? Let's explore some of its key benefits: Ease of Use:  Snip & Sketch is incredibly intuitive. It's integrated directly into Windows, so there's no need to download or install any additional software. The interface is clean and straightforward, making it easy for anyone to pick up and use...

Technique Tuesday: Weaving Bracelets Using a Bracelet Loom

Image
This summer I watched quite a few crafting videos online and wondered if I should incorporate my own spun fabric into my sewing & fabric art mix. Before I dropped hundreds of dollars on a large weaving loom I decided that I should try something a wee bit smaller to get my feet wet and see if it was something I really wanted to do or a whim. So, I purchased the Bracelet Loom by Leisure Art . Now it doesn't have all of the fancy moving parts that a Rigid Heddle Loom has, but the basic concepts are there and it gives me the opportunity to flex or scratch that itch. My $8.99 + tax investment in the loom along with a purchase of embroidery floss and what I thought was embroidery floss, but turned out to be craft thread, all from Hobby Lobby got me started. I later shopped online shopping for clasps to finish the bracelet. I opted for brushed brass.  I was all set to start my venture in weaving. That is until I read the instructions and started scratching my head and weeping. I neede...

Technique Tuesday: Assembling the 10 Spool Thread Stand

Image
The one thing single needle embroidery machines do not have is a thread stand, with needles threaded for color changes. But that doesn't mean we home sewists, hobbyists, designers, thread artists are limited. There are tools on the market to ease the burden of changing colors when machine embordering our designs. I personally own this 10 spool thread stand and it is wonderful. I don't just use it when I embroider, I also use it for large thread spools that don't fit neatly on my sewing machine and when I plan to stitch in different thread colors. I purchased the ten thread spool, thread stand. There is a 20 version on the market, but I thought that was too many for me. There are also 1, and 2 thread stands too. Video Ready to start sewing your project? Please leave your comments below on what you plan on making .  This blog isn't sponsored If you enjoy reading my blog posts please consider supporting my creative endeavors by donating via  PayPal Me  or  Buying Me a C...

Technique Tuesday: Use Ban-Roll to Sew Narrow Hems

Image
Whether you use the roll hem foot or manually fold those hems, it's always good to have another technique in your sewing toolbox. This Technique Tuesday, Downtown Tailoring will demonstrate the Ban-Roll technique to sew narrow hems. I haven't tried it yet as I don't have a project that requires narrow hems at the moment, but if you give it a try, let me know in the comments below. Video This technique is from Downtown Tailoring located in Ottawa, Ontario Canada. Ready to start sewing your project? Please leave your comments below on what you plan on making .  This blog isn't sponsored If you enjoy reading my blog posts please consider supporting my creative endeavors by donating via  PayPal Me  or  Buying Me a Cup of Tea/Coffee .  

Technique Tuesday: Yarn Couching with the Rolled Hem Foot

Image
Hi Everybody, recently I learned that you can do yarn couching using the Rolled Hem foot. So, no need to purchase a Couching foot. It also means that the Rolled Hem foot has multiple uses, which is great. When couching yarn you can use thread the color of the yarn so that the yarn stands out or choose to use a contrasting color on the yarn so the stitches stand out too. And lastly you can use nylon microfilament thread so that the stitches disappear and the yarn seems to float on the garment.  I did a test sew using my old standard, an old bedsheet. In the image above I used  medium weight size 4 worsted acrylic yarn, a wide ribbon, and sari yarn that I purchased to felt with. The three white cords are craft yarn that I corded, something I will discuss in a future blog.  I purchased monofilament thread  Sew-ology1001 Transparent Nylon Thread from Hobby Lobby on sale for .99.  I also purchased a larger set of 6 additional Rolled Hem feet to create hems in the fo...

Technique Tuesday: Stacking Stitches

Image
Hello everyone, this Technique Tuesday we are focusing on decorative stitches that come with sewing machines. Specifically  sewing two decorative stitches in different colors on top of each other: stacking stitches. This summer I finally created a stitch chart of all of the stitches that came with my sewing machine. My machine comes with 250 stitches, so I repurposed items I had in my house to create a functional, nothing fancy stitch book.   I used an old 3-ring binder, an old bed sheet that I cut up, 40wt and 60wt thread and stitched out all of my stitches. Experts, that is seasoned sewists, recommend that you create a stitch chart or guide because the stitches on your machine or in your machine's guide will stitch out differently on fabric. My guide isn't fancy like some you will see on blogs, PBS or YouTube channels. My guide is practical. I can flip through it, see the stitches I want to sew and stitch them out. I also included quick reference guides with tips ...

Technique Tuesday: Machine Embroidered Greeting Cards

Image
I love machine embroidery and I also love making handmade cards. So, imagine how I felt to learn that embroidering cards is trending now. Some people are using dies that are specifically made to die cut and then use embroidery floss to create the card front or insert.  Circular Stitch Background Metal Cutting Dies And that is a lovely thing to do, however it is limiting. Sure you can change colors of thread & cardstock to make each card different, but if you truly want something unique, combining machine embroidery will allow you to do just that. And if you digitize your own designs or edit an existing design to customize as your own, you will truly have a one of a kind design. Video Here are some tips for creating unique custom, bespoke handmade cards by the Embroidery Library Ready to start crafting your project? Please leave your comments below on what you plan on making .  This blog isn't sponsored If you enjoy reading my blog posts please consider supporting my creat...

Technique Tuesday: Punch Needling Stitch Size & Row Space

Image
Ok, so you've got your fabric, yarn, needles, and design that you want to tuft aka punch needle, but you're not sure how large your stitches should be. How far to space them apart, and which side of the design is the right side. This Technique Tuesday we will cover that. You'll learn how to properly space your stitches. How wide your rows should be and how changing stitch length changes the dynamic of your fabric art/rug. Video: Stitch Size & Row Spacing This video is from the Oxford Company. The Oxford Company has a great selection of blogs called # OxCoPALs and videos that walk you through the basics of Punch Needling as well as Rug Hooking. I recommend going over there to learn more.  Ready to start crafting your project? Please leave your comments below on what you plan on making .  This blog isn't sponsored If you enjoy reading my blog posts please consider supporting my creative endeavors by donating via  PayPal Me  or  Buying Me a Cup of...

Technique Tuesday: Fabric for Punch Needling

Image
This Technique Tuesday we will learn how to select the appropriate fabric to work best with our punch needling projects. I do needle felting with an embellisher machine and by hand. And I love that you can use various substrates and felt with them. It puts the MIX in mix media projects. However, when it comes to hand embroidery, the fabric you construct your project on is quite important. Consider the following fabric options: Monk Cloth : This is a tightly woven fabric that is made from 100% cotton. It is a good choice for punch needling because it is durable and has a nice texture. The Dorr Mill Monk's cloth is woven specifically for punch needle art. Try to find one that has 12-14 holes in it. It is a self healing fabric. Linen : This is a natural fiber fabric that is known for its strength and durability. Linen is a good choice for punch needling because it is easy to work with and has a nice drape. Boao Linen is a great choice for making heirloom projects. It is a self...

Technique Tuesday: Punch Needles Types

Image
Last week we learned about the Punch Needling technique. This Technique Tuesday we will learn about the variety of punch needles on the market and determine which one will work best with our projects. Oxford Punch Needles Video: Which Punch Needle to Purchase This video purchasing guide is from Vera at Studio VerSie.   Oxford is the cadillac of Punching Needles, this video is a guide to their selection of needles. The Oxford Company has a great selection of blogs called # OxCoPALs and videos that walk you through the basics of Punch Needling as well as Rug Hooking. I recommend going over there to learn more. Especially how to transfer your pattern to the backing fabric . Ready to purchase some punch needles and work on a custom fabric art project? Please leave your comments below .  This blog isn't sponsored If you enjoy reading my blog posts please consider supporting my creative endeavors by donating via  PayPal Me  or  Buying Me a Cup of Tea/Co...

Technique Tuesday: Punch Needling

Image
Hey Everybody, I am still leaning hard on the fabric art trends. This is my 2023 - creating art that inspires and elicits joy. Well, in mid July 2023 I discovered a new fabric art technique. It is new to me, but not new in general. It is a technique that is becoming quite popular as a relaxing way to get into creating fabric art, pillows, rugs, whatever your heart desires, and I am talking about Punch Needling! Images: Pllieay Punch Needle Embroidery Starter Kits Punch needling is a type of embroidery that uses a punch needle tool to create loops of yarn on a fabric. The punch needle tool has a hollow shaft that the yarn is threaded through, and a sharp point that is used to punch the yarn through the fabric. The yarn loops are then pulled tight, creating a fabric with a dense, textured surface. Punch needling can be used to create a variety of projects, including wall hangings, pillows, rugs, and coasters. It is a relatively easy techni...

Technique Tuesday: How to Get Started with Weaving

Image
I hope you enjoyed last week's technique and got started making your own loom. Today's technique will focus on how to get started with weaving and we will learn how to begin weaving on the cardboard loom.  Whether you are using the loom you created last week or working with a loom you purchased these tips should set you up for a successful start to weaving on a loom. Video: Weaving for Beginners This technique is by Fibers & Design Weaving , and it picks up from last week's blog on how to build your own cardboard loom. Recommend reading that blog and watching that video first. How's Your Confidence Level? Ready to get started on creating your own custom woven designs? Please leave your comments below.  This blog isn't sponsored If you enjoy reading my blog posts please consider supporting my creative endeavors by donating via  PayPal Me  or  Buying Me a Cup of Tea/Coffee .